Here’s how to set one up.
What’s a Direct Connection?
RealVNC uses its cloud service to discover two endpoints. Namely, one will be the computer you connect from and the other one – the one you’re connecting to.
Obviously, cloud connections have multiple advantages. They’re quick to set up, secured with 256-bit AES encryption, require no configuration, and are an easy way to get to the machine you need quickly.
However, there are environments where direct connections are the only option. This is because data is not supposed to go outside the network. The only condition is that you have an Enterprise subscription; you also need the network details for the machine you’re connecting to. It is also possible that some router or firewall configuration will be required.
Enabling Direct Connectivity
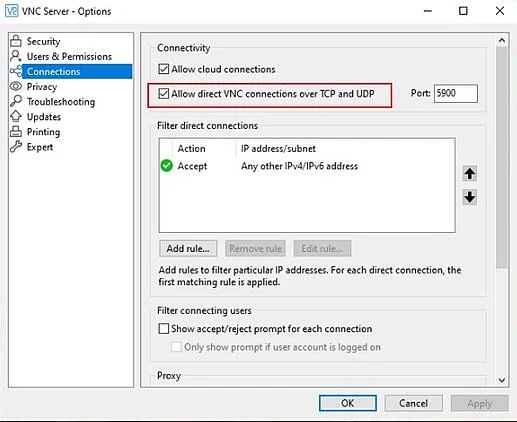
Provided all of the above is not an issue, enabling the feature is very simple. On the machine you want to control, open Options in the VNC Server. Then, under Connections, make sure you Allow direct VNC connections over TCP and UDP.
After that, go to the main VNC Server screen and then Other ways to connect. One of the things shown in there will be the IP address of that machine. Make note of that, as you will need it upon connecting.
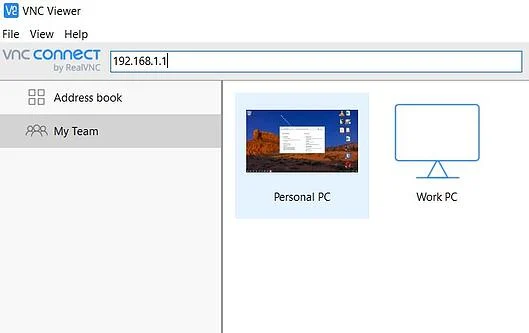
Then, if you want to connect to that Server using VNC Viewer, just type that IP address in the search box at the top. Or you can use the hostname if you have it. Then hit Enter on your keyboard. You’ll see a confirmation screen, asking you for your credentials, depending on the type of authentication on the VNC Server. After that, you’ll be connected.
In short, in a highly secured environment, a direct connection is a way of not allowing data to leave your network.
Another great option to connect is Instant Support. Learn more about it and how to use VNC Connect’s essential features here.
And, if you haven’t already, make sure you take advantage of our 14-day free trial!
