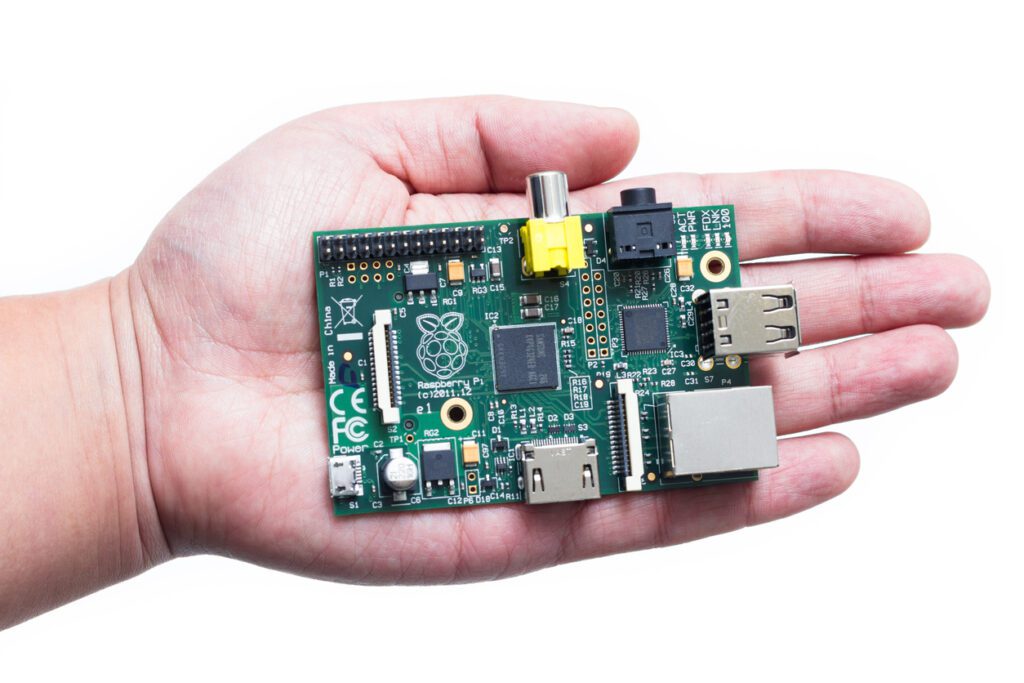
Why use a Headless Raspberry Pi?
I find my Raspberry Pi useful for various tasks. Primarily, it serves as a network-attached storage device.
However, this means that I do not access it all the time. Therefore, keeping a screen attached to my Pi would waste space and resources.
There is a reason why many choose to adopt the Raspberry Pi – these little devices are versatile and can lend themselves to many uses. For example, some companies use their Pi to control irrigation systems, while others use it to monitor active systems. They’re even used to monitor solar panels. The possibilities are endless. But, like my case, a screen would just sit unused for most of the time. On the other hand, your Pi might be physically far from your office – from your home to a completely remote area, like a vacation residence as part of a security system.
Personally, using a display was uncomfortable, as I had to run a cable behind a wall-mounted TV. Second, when I need to use the Pi, I’m generally in the office (and it’s rarely for long amounts of time). That means remote access can create efficiencies.
What’s the solution, then? You could keep the Pi next to a TV and plug in the HDMI cable when needed – but that still involves running a cable.
Luckily, a much more straightforward answer to the question exists. You can use the Raspberry Pi headless. You’ll need to connect it to a display for the (speedy) setup process. After that, you should be able to disconnect the screen for good. You’ll then access the headless Raspberry Pi from VNC Viewer as if you were in front of it.
Setting up your headless Pi with VNC Connect in 4 easy steps
Let’s look at the four easy steps to connect both to work seamlessly. Don’t worry; the process is easy.
1. Make sure you’re using the latest version
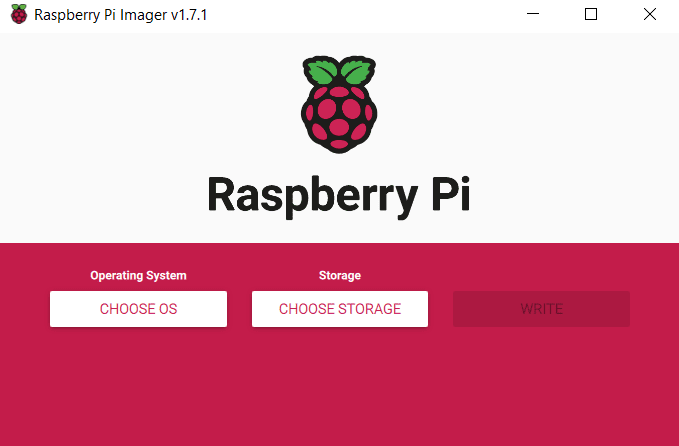
In this first step, start with two things. First, make sure you’re using the latest version of Raspberry Pi OS. At the time of writing, this is Bullseye. You can use the Raspberry Pi Imager tool to upgrade to the newest version, should you need to. Though, make sure that you’ve backed up your data beforehand.
Next, you’ll initially need to connect the Pi to a monitor or TV. Of course, it will need to have an internet connection.
2. Set up VNC Server on your Raspberry Pi
As you might know, VNC Server comes preinstalled on Raspberry Pi. This convenience is why enabling it is easy. To guide you through this, look at my instructions on setting up VNC Connect on Raspberry Pi.
Once you’ve been through the whole process, your Raspberry Pi should show up in the list of devices in VNC Viewer.
3. Configure the resolution
The third step depends on the use of your Raspberry Pi. If it’s to access software with a single window, it only requires more resources. However, if you use the machine to access various media like me, you may want it to run in Full HD resolution.
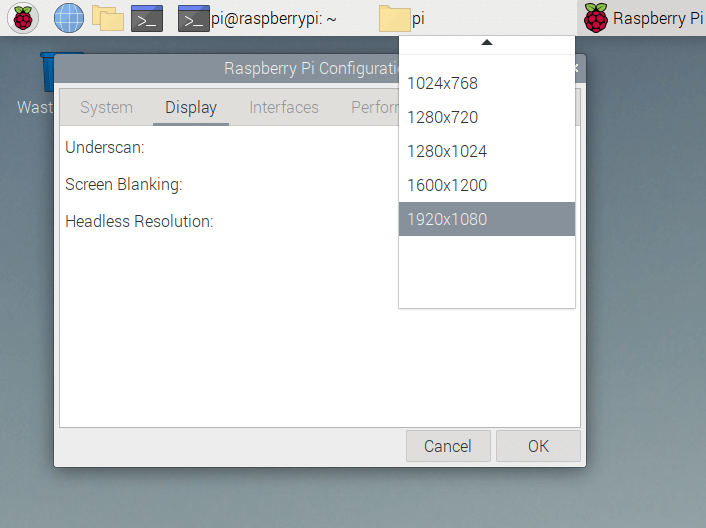
Either way, changing the resolution is not difficult. In your Raspberry Pi menu, go to Preferences > Raspberry Pi Configuration.
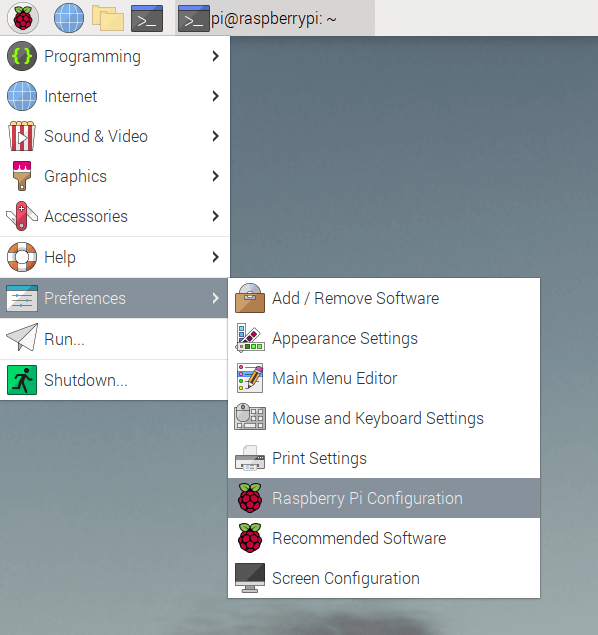
Once you’re there, click the Display tab. In there, you’ll come across Headless Resolution. Select the resolution that fits your purposes, and then reboot as prompted.
4. Disconnect your display and use your headless Raspberry Pi
Once rebooted, you can disconnect whichever display you were using. Once you’ve confirmed that, you can get to the Pi. And that’s it.
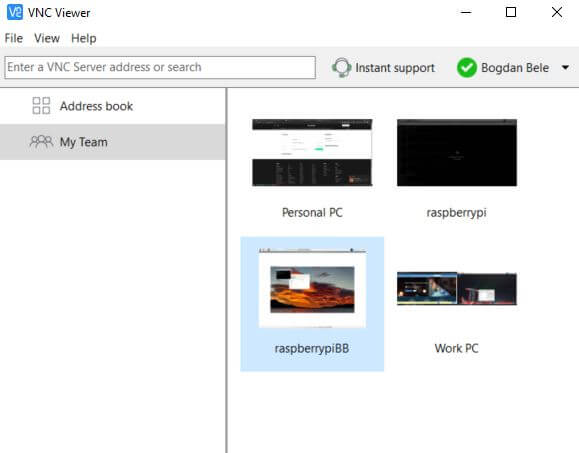
Now you can set your Pi somewhere comfortable, and when you need to access it, it’s a simple double-click away within the VNC Viewer. And no monitor is required.
